
Help centerWhite labelYour logo and colour
Your logo and colour
Put your own logo and colour on the scanner your staff use at the counter, and at the top of your dashboard. Open White label under Account in the left-hand menu.
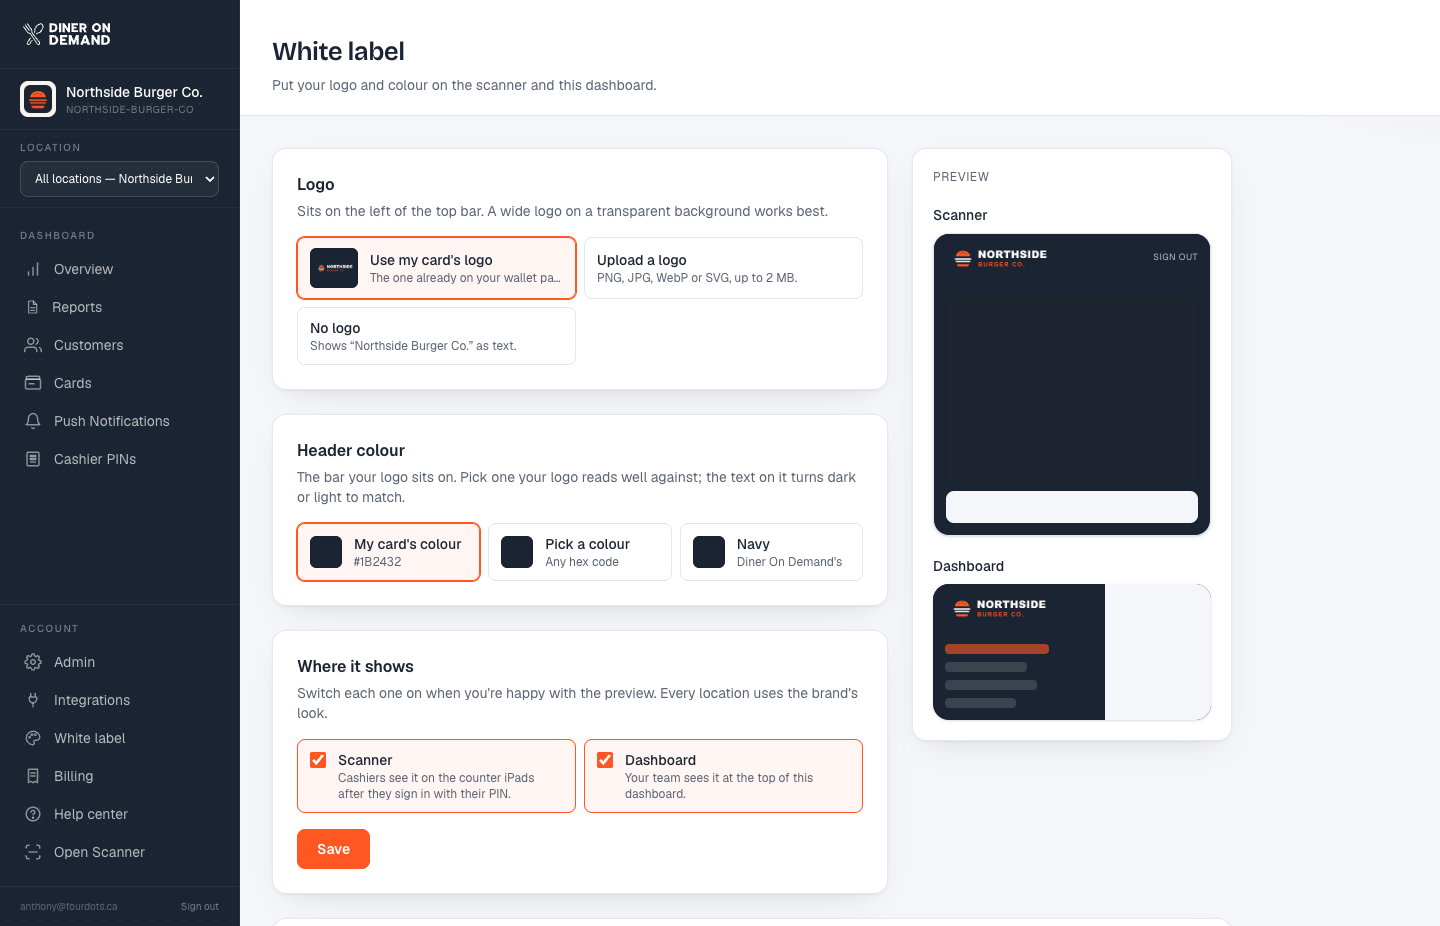
Set it up
- Logo. Use the logo already on your card, upload one, or show your business name as text. Uploads can be PNG, JPG, WebP or SVG, up to 2 MB. A wide logo on a transparent background works best.
- Header colour. Use your card's colour, pick any colour, or keep the navy. Text on the bar turns dark or light so it stays readable.
- Where it shows. Switch on Scanner, Dashboard, or both. The preview on the right shows exactly what each will look like before you save.
- Click Save.
What changes
| Switch | What your team sees |
|---|---|
| Scanner | Your logo and colour across the top of every scanner screen after a cashier signs in with their PIN, including the loading screens. The sign-in screen itself stays neutral, because the scanner doesn't know the business until the PIN is entered. |
| Dashboard | Your logo on your colour at the top of the left-hand menu, and across the top bar on a phone. |
The scanner picks up a change the next time a cashier opens a page. Nobody needs to sign out.
Switching it off
Untick the switch and click Save. That screen goes back to the Diner On Demand look. Your logo and colour stay saved for next time.
Multi-location brands
White label is set once on the brand account, and every location uses it. A location login sees a note that points to the brand's page. A login for a single location can't change it.
Still stuck? Email support@dinerondemand.com.